How to Add a Custom Dashboard Logo in WordPress
https://www.wpbeginner.com/wp-themes/adding-a-custom-dashboard-logo-in-wordpress-for-branding/


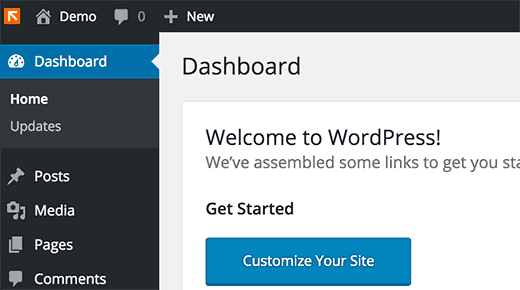
Do you want to add a custom dashboard logo in WordPress? Often people replace WordPress logo with a custom dashboard logo for branding purposes. In this article, we will show you how to add a custom dashboard logo in WordPress for branding.

Method 1: Adding a Custom Dashboard Logo in WordPress Using a Plugin
This method is easier and recommended for most beginners.
First thing you need to do is install and activate the White Label CMS plugin. For more details, see our step by step guide on how to install a WordPress plugin.
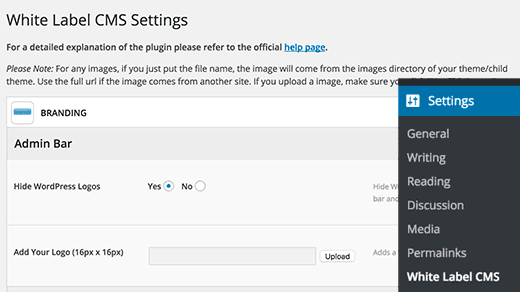
Upon activation, you need to visit Settings » White Label CMS page and click on the Branding tab to expand it.

Next, you need to click on ‘Yes’ to hide the WordPress logo and then upload your own custom logo. The custom logo should be exactly 16 x 16 pixels in dimensions.
Don’t forget to click on the save changes button to store your settings.

Aside from custom dashboard logo, White Label CMS also offers other features to rebrand your WordPress installation. See our guide on how to white label the WordPress admin dashboard for detailed instructions.
Method 2: Manually Adding Custom Dashboard Logo in WordPress
This method is for users who are comfortable pasting code snippets in WordPress.
First you need to save your custom logo as custom-logo.png file on your computer. It needs to be exactly 16 x 16px in dimensions.
Once you have your custom logo ready, you need to upload it to
/wp-content/themes/your-theme/images folder using FTP. If your theme does not have an images folder, then you need to create it.
After uploading you custom logo image, simply add this code to your theme’s functions.php file or a site-specific plugin.
1
2
3
4
5
6
7
8
9
10
11
12
13
14
15
16
17
| function wpb_custom_logo() {echo '<style type="text/css">#wpadminbar #wp-admin-bar-wp-logo > .ab-item .ab-icon:before {background-image: url(' . get_bloginfo('stylesheet_directory') . '/images/custom-logo.png) !important;background-position: 0 0;color:rgba(0, 0, 0, 0);}#wpadminbar #wp-admin-bar-wp-logo.hover > .ab-item .ab-icon {background-position: 0 0;}</style>';}//hook into the administrative header outputadd_action('wp_before_admin_bar_render', 'wpb_custom_logo'); |
This code simply adds CSS required to display your custom logo in the WordPress admin bar.
That’s all we hope this article helped you learn how to add a custom dashboard logo in WordPress for branding. You may also want to see our guide on how how to hide unnecessary items from WordPress with Adminimize.
Comments
Post a Comment