Conditional Fields for Contact Form 7 Tutorial
https://conditional-fields-cf7.bdwm.be/conditional-fields-for-contact-form-7-tutorial/
 Click the add new conditional rule button and enter this information:


In this tutorial we will create a simple support form with conditional fields.
The end result
Because you probably wonder what the end result is going to look like, here it is! Go ahead and submit the form. No data will be emailed to anyone, instead you will get a preview of what the email will look like. Make sure to try both options (sales and tech) to see the difference in the email message.
The specs
These are the requirements we want the form to meet:
- The user should be able to choose whether their question is technical or sales related.
- If it’s a technical question the user will need to select their operating system (OS) from a drop down list
- After selecting their OS, the user needs to specify his version. The field’s label should change dynamically according to the selection.
- The user can also choose Other. In this case they are presented with 2 fields to specify their OS and version.
- If the question is sales related, the user is presented with a drop down menu where they can select their continent.
- If it’s a technical question the user will need to select their operating system (OS) from a drop down list
- After submitting the form, the user will automatically get a personalized message. The message they get should vary depending on what they selected in the support type drop down list.
Getting started
Make sure Contact Form 7 and Conditional Fields for Contact Form 7 are both installed and activated on your WordPress site.
In the WordPress admin, go to Contact > Add New to create a new form. Enter the form code below:
This is about the best we can do without conditional logic. As you can see, the “Other” option is missing and there are a couple of fields that are irrelevant to the user in certain cases.
Creating groups
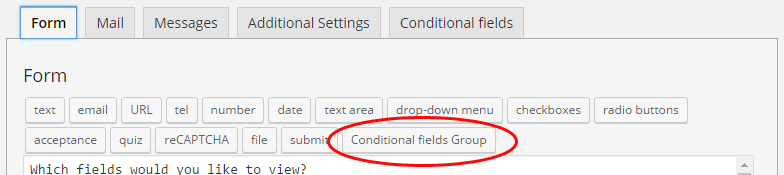
In order to hide certain parts of the form we can wrap these parts between
[group group-name] ... [/group] . You can simply type this code once you get the hang of it, but to assist you, you can also generate this code by clicking the Conditional fields group button:
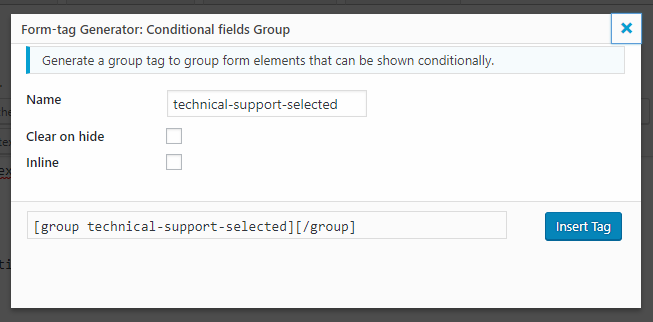
After you click this, a popup will appear where you can choose a name for the group.
You can also select any of these options:
- Clear on hide : this will clear all the fields in the group the moment it gets hidden.
- Inline: this will render the group as a <span> element instead of a <div>. (Note that nesting block level elements like <div> inside inline elements like <span> is invalid HTML.)
We will leave these options unchecked for now and create our first group called technical-support-selected.
Click the Insert Tag button to insert this code:
[group technical-support-selected][/group] . Now you will need to enter the relevant part of the form between the closing and ending tag, like this:
Nesting groups – Note that groups can also be nested. So, it is possible to add a group with a field where the user can specify his OS version, inside the technical support group.
If you save the form at this point, everything between the group tags will be invisible on the front end. That’s not very useful. So, on to the next step!
Adding conditional logic
In order to make a group appear if some conditions are met, we will need to add conditional rules.
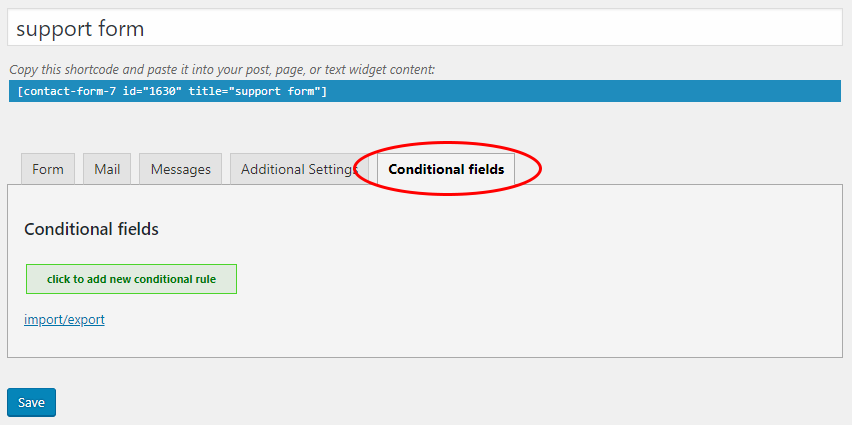
Make sure you save the form first, and then click the Conditional fields tab.
Click the add new conditional rule button and enter this information:
This rule will make sure that the technical-support group will become visible, after the user select “Technical support” from the drop down list.
Let’s create another rule now:
show [os-selected] if [operating-system] not equals "-- Choose your operating system --"
This rule will cause the Version text field to appear once the user has selected an OS. We achieve this by checking if the selected option in the drop down list is not equal to the text
"-- Choose your operating system --". This is fine, but we want something slightly more advanced. If the user selects “Other” from the drop down list, we don’t want to show the [os-selected] group, but instead we want to show another 2 fields where they can specify their OS version.
So we need to hide the [os-selected] if the condition above is met AND if [operating-system] is not equal to “Other”. To achieve this we can click the end button next to the first condition and fill out the fields like this:
Now, if any OS is selected (apart from “Other”), the [os-selected] group will appear.
I hope the basics are now clear. Next, let’s finish up the form and add all the conditions.
The finished form
If you want to reproduce the form at the top of this page, simply paste this form code in your Contact Form 7 form.
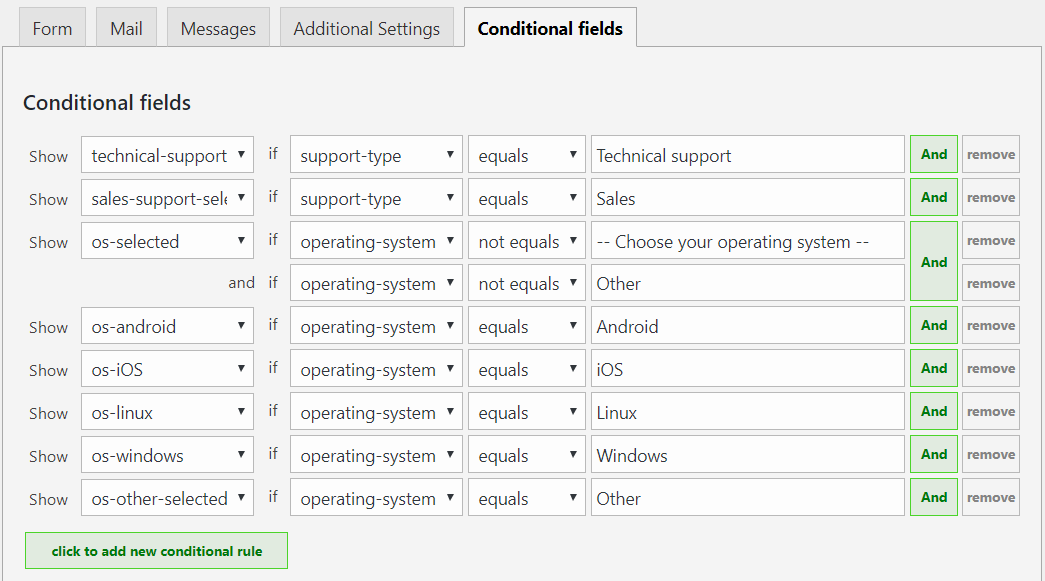
Save the form, switch to the Conditional Fields tab, and enter these rules using the import/export link:
Click the Overwrite conditions button and you should see these fields appear:
Save the form once more, copy your Contact Form 7 shortcode to a new page (if you haven’t done so already) and publish your page. That’s it! Only one thing left to do now.
Customizing the email message
With Conditional Fields for Contact Form 7 it is possible to customize your email messages based on which conditional rules were met during form submission. You can do some pretty complex stuff with this, but let’s keep it simple for the sake of this example.
We just want to show the text “Thank you for submitting your technical support question” if the user selected Technical support, and “Thank you for your sales question” if they selected Sales. Then we are going to list only the fields that were visible during form submission in an HTML table.
We can achieve the customized message like this:
Note that we open the
[sales-support-selected] tag directly after closing the [/technical-support-selected], this is in order to prevent unwanted white-spaces from appearing in the email message.
Next we can create a table with all the fields like this:
As a little bonus, here is a tool I created to convert contact form 7 code to email code. You can use it to help you in composing your email messages.


Comments
Post a Comment